Architecture Blender - by Jason W. Higley

Create architectural models (and many other things) using the free open-source Blender software, which you can get by clicking the Blender icon link to the right (not affiliated with Jason Higley).
A Sunny Room in Blender
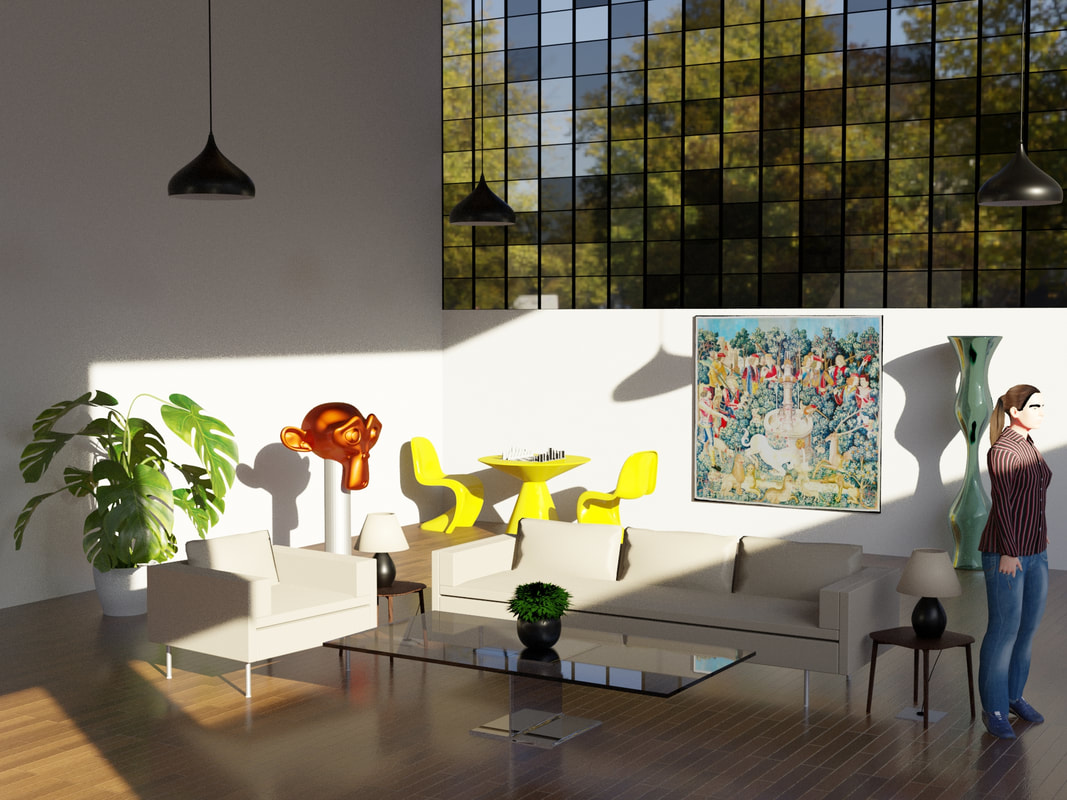
A Sunny Room - the above room created and rendered by me in Blender Cycles. The floor, window, walls, monkey (Suzanne), table plant, plant pot, table lamps are elements found within Blender 2.82. The living room furniture models by Herman Miller (available on their website), which are slightly modified to randomize the pillow bumps, and the I-beam table glass scaled 2x in one axis, small table scales changed. The Hanging lamps (slightly modified), large floor plant, and yellow table and chairs, and the chess set are free from Chocofur store. 2 image textures were imported, one for the tapestry (from a hundreds of years old real one that I've restored the image a bit here), and the background trees (which are in a free HDRI image from HDRI Haven.) Human was modeled in MakeHuman and exported/imported as a Collada .dae file (HOWEVER, if you want to pose them try .fbx export from MakeHuman, but beforehand on the Pose/Animate tab look on the right hand side and select "Rig presets" tab and select "Cmu mb", then import the .fbx file into Blender; the mapping of the skin image will be wrong, I had to throw out the skin image from that as it was misbehaving color wise, so for the skin I used a Principled BDSF shader. Once imported, go to Blender's "Pose Mode" and on the right side Pose icon "Viewport Display" select the "In Front" check box so that the pose bones rig shows up for posing, and select the bone to be posed and click the Rotate button and rotate it to the pose you like. Also, the eyes may not behave properly on the .fbx import (they don't for me), so I imagine (I haven't tried it yet) that perhaps bringing in the Collada .dae version of the eyes to the same base point would be wise? I welcome any solution suggestions for that.
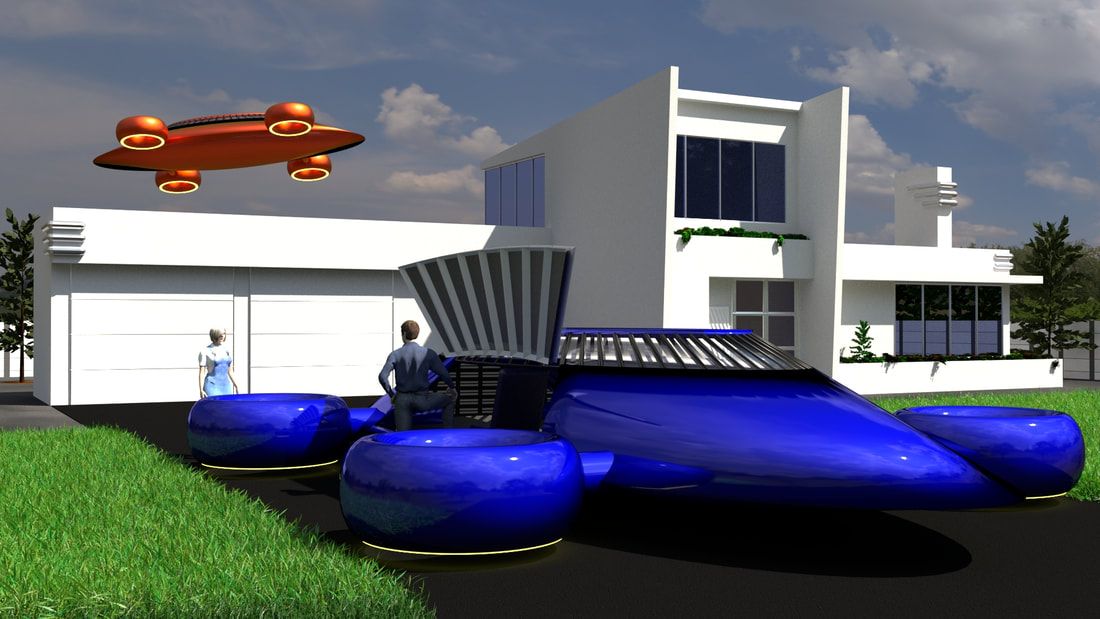
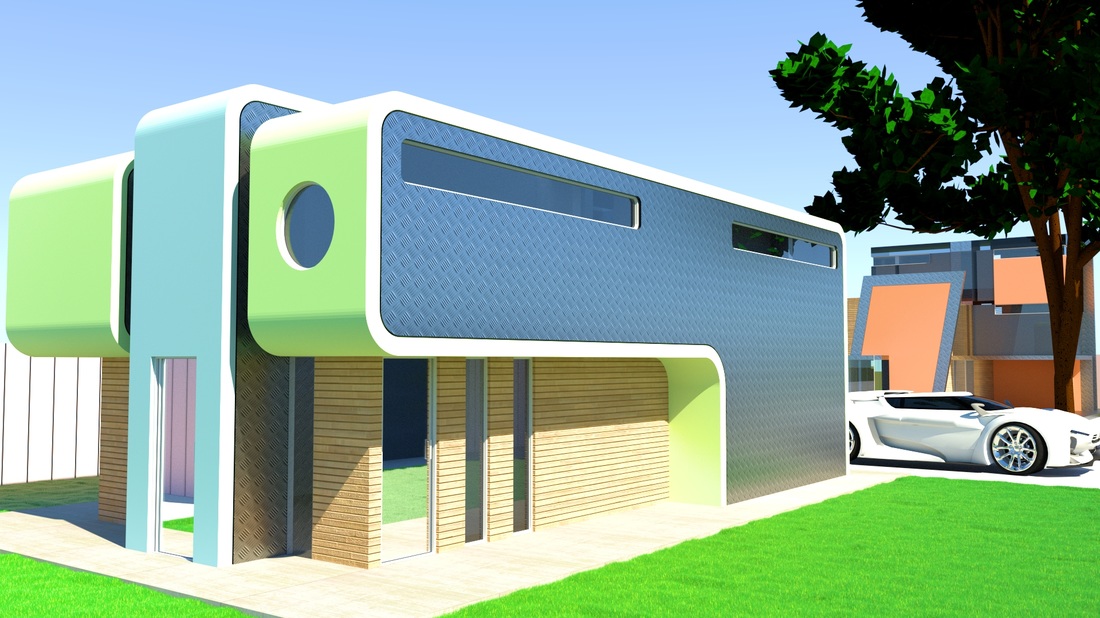
Retro Home Future Sky - The above was created and rendered in Blender. The grass is procedurally generated using only a particle system, no shape meshes, just playing with the hair tip (set to zero), base (fatter than zero) and adjusting the brownian, randomizing the placement and only having 2 segments per piece of grass, that's 50,000 strands of grass on the left, 100,000 on the right (mostly hidden by the vehicle). People are Collada .dae format imports from MakeHuman. Sky is free from HDRI Haven. The vehicle bodies are stretched diamond meshes, anti-grav pods are mesh torus's.
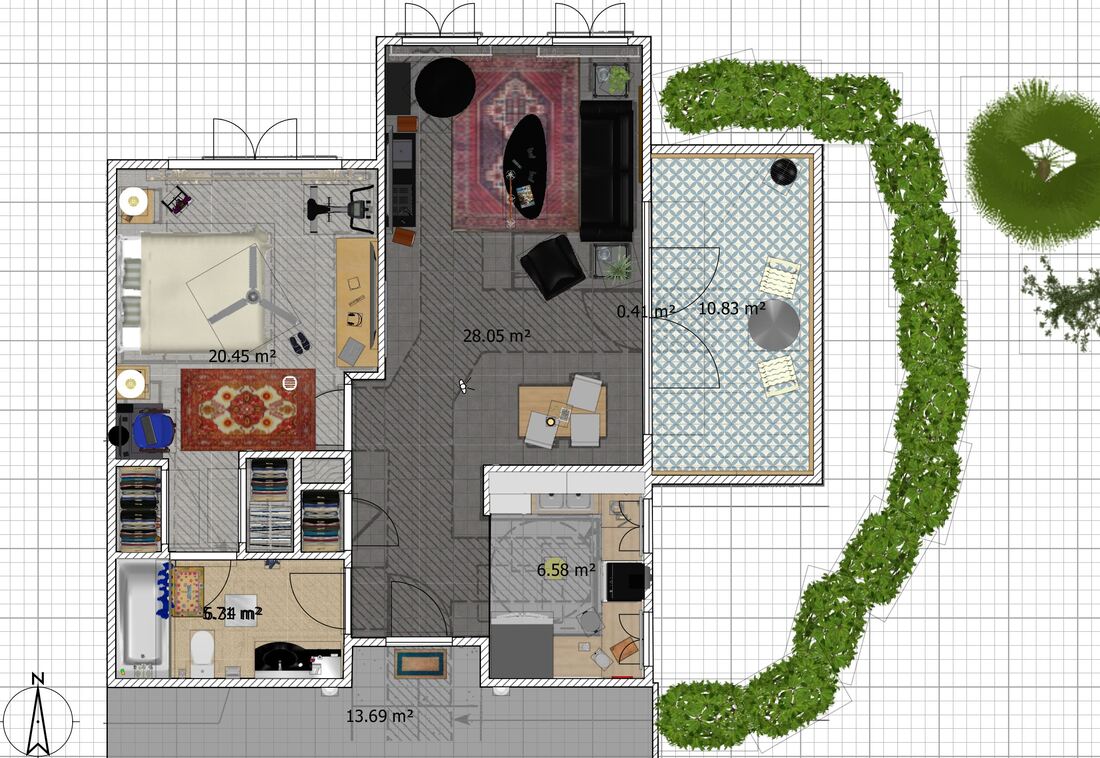
RENDERS IN BLENDER 2.91 OF SWEET HOME 3D IMPORTED MODELS - I recently created the following 8 images from .obj format exports from the free Sweet Home 3D (SW3D) program into Blender and rendered them in Blender's Cycles ray tracing engine. You'll sometimes need to change the materials, but for the most part they work well. You can export from SW3D by right clicking the 3D view in SW3D and selecting the pull-down menu "Export to OBJ format." In order to bring the .obj file down to scale in Blender I selected the imported object and hit "s" (scale) and entered ".01" (so keystroke "s" and then enter .01), and then to check it I made a mesh cube that was the equivalent of the door opening width and it fit in the doorway. Another benefit of using SW3D (I'm not affiliated with them) is you can create dimensioned floor plans and save them as .pdf's, and it also creates an objects used schedule/table. More on SW3D further down, but now I'm going to talk a lot more below about Blender for rapid Arch Vis.


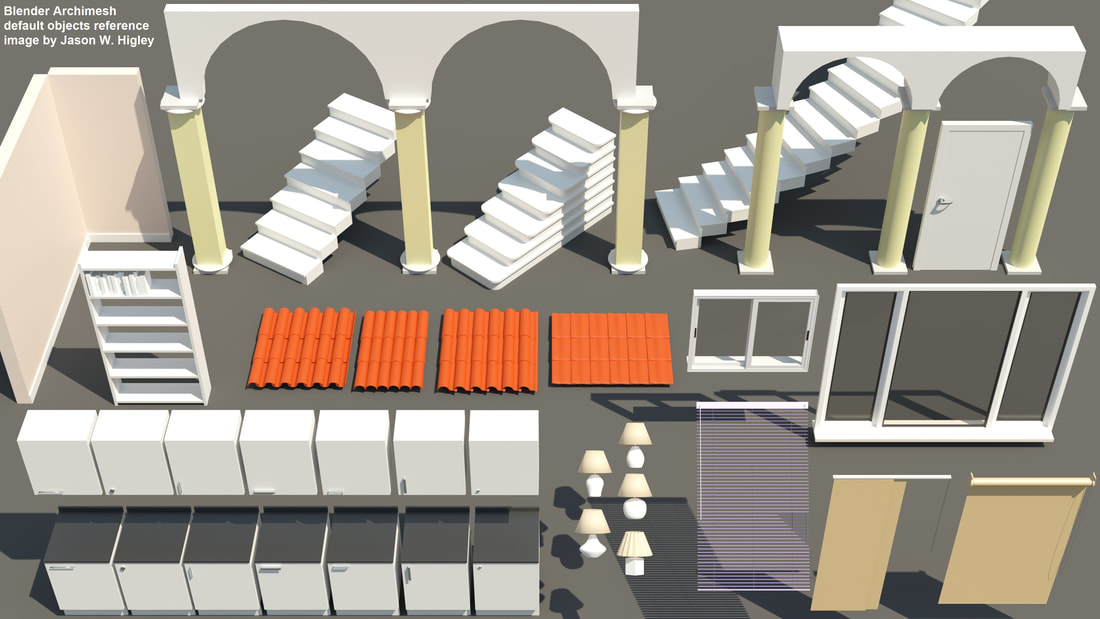
Archimesh - below are the default elements of Blender's Archimesh in version 2.8. Archimesh is much more difficult to use than Sweet Home 3D but it creates SEPARATE things native to Blender, so if you want to have an all-Blender model without where you can segregate each item separately for editing and manipulation, it might be better to use Archimesh in some cases than Sweet Home 3D as the exports from Sweet Home 3D are the entire thing becoming one object (one .obj file) that can be very difficult to work with in Edit mode because you will have some object very close to others with complex geometry that can become very difficult to select/edit for deletion, moving, or anything. Archimesh also creates separate objects to easily manipulate walls and baseboards that are basically mesh planes with thickness modifiers (any thickness). Columns have settings for arrays, and arch centers can be adjusted. Stair settings allow rounded edges, sides filled to the floor, and stair curve shapes can be manipulated with built-in handles. The door handle options have been reduced (but you can get them from an earlier version, or use Archipack's.) There are 4 roof tile types (you can set the number of tiles too). The window parameters are fully adjustable (but I would change the glass to the VX Materials version). The cabinets show the various handle types, cabinet dimensions and number of shelves are adjustable too. Lamps have 5 basic body types, but you can easily change all of them to any desired form in the settings (very useful for creating customized vases, ceramics and pottery too). Venetian, Japanese and roller blinds are adjustable in length. Number of books, their dimensions and randomness in size and shelf design is also customizable. Like other 3D programs, any object can have any color or material surface (such as wood, concrete, metal, plastic etc..)
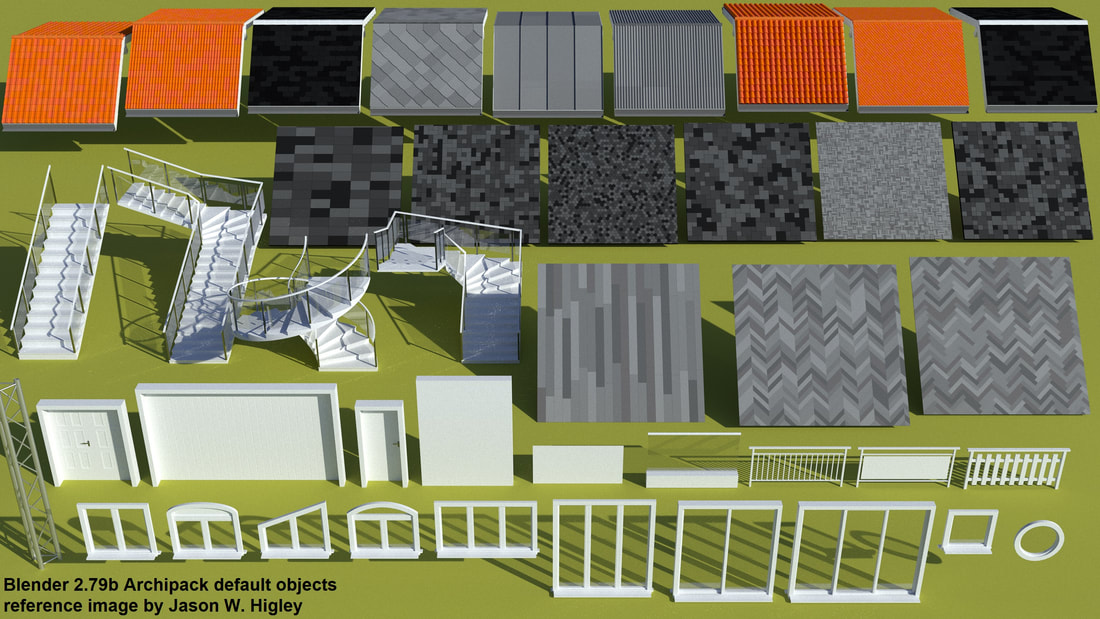
Archipack - ARCHIPACK NO LONGER WORKS IN ALL OF MY COPIES OF BLENDER FROM 2.8 TO 2.91 - Above are the default Archipack elements in the free version for Blender 2.79b (not the €49 version for 2.8; these were laid out in 2.79b and rendered in 2.8 as a test). You can get version 2.79b any time (and use it free forever!) because it's open source and available at blender.org ,and I recommend keeping a local copy of Blender Version 2.79 as you can also use it to help you bring older version assets into the new 2.8 (like direct conversions of older Sketchup models using the Sketchup Importer, and 3DS models, which are no longer supported in 2.8, etc..) In 2.8 you have to purchase Archipack in order for it to work (and since the Free version is broken in 2.8, IMO it really should NOT be included as an add-on option.) That said you can see here that the windows, doors, stairs, fences, floors, truss, and roof's have some useful attributes for quick visualizations. Of course you can create all of these things (and anything else) in Blender 2.8 yourself, but these could speed some things up a bit.
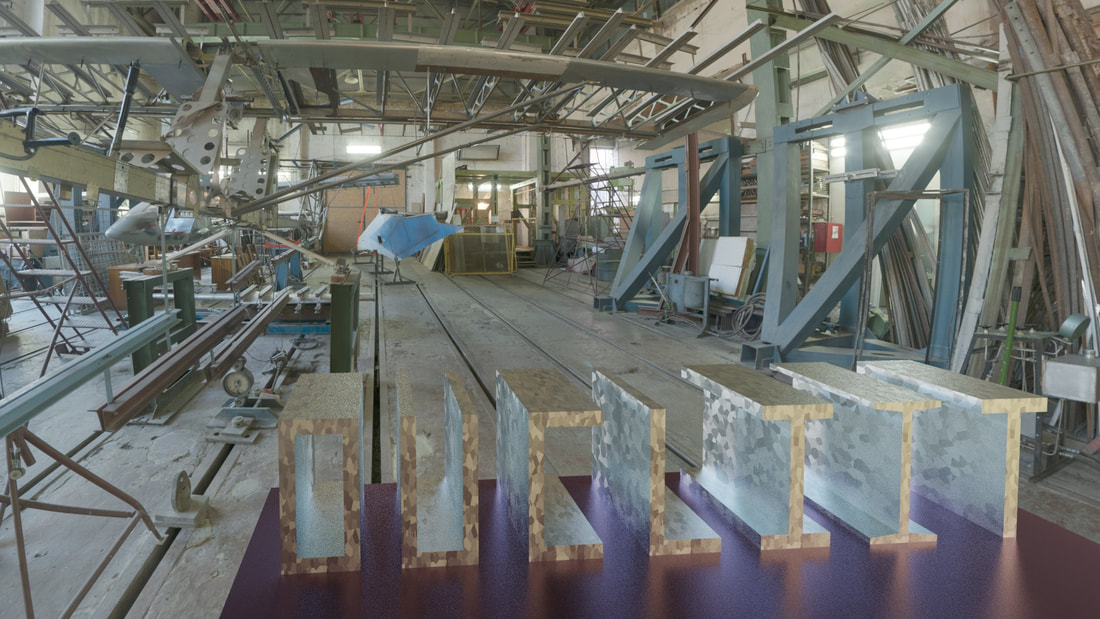
Below are Blender's built-in Beam Builder default shapes, which has beam profiles of O,U,C,L,I and T beams. You can adjust the taper (visible in the 2nd I beam) and it also allows control of beam height, width, depth, thickness. Background by HDRI Haven.
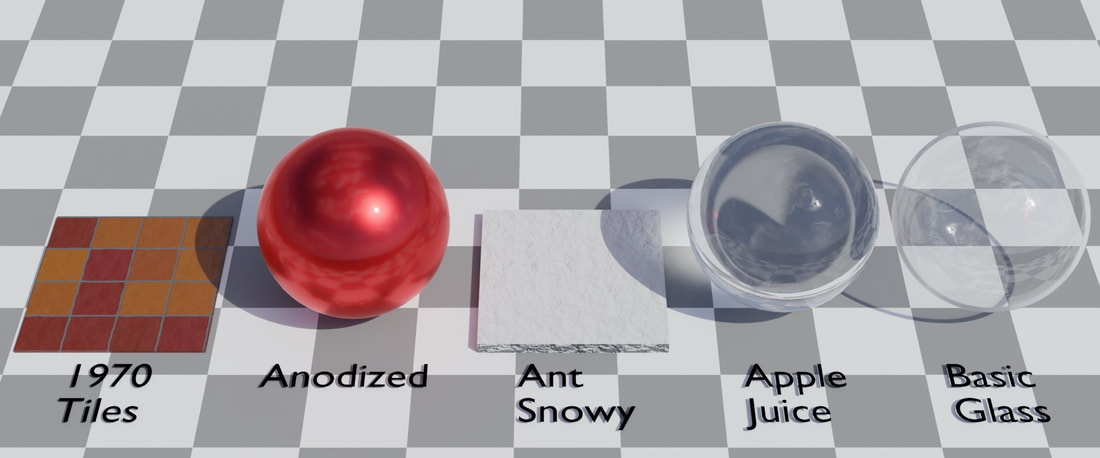
Here's a reference video I've made, Blender Material VX Library for Blender 2.8 (I have to make a new one for 2.9x, which has less) - Cycles Materials, which comes for free in Blender (just select add-on in preferences)
|
|
The Materials/Texture page also now has all of the Material VX Library - Cycles Materials for version 2.8 on a single page (2.9x, which has less, is coming).
|
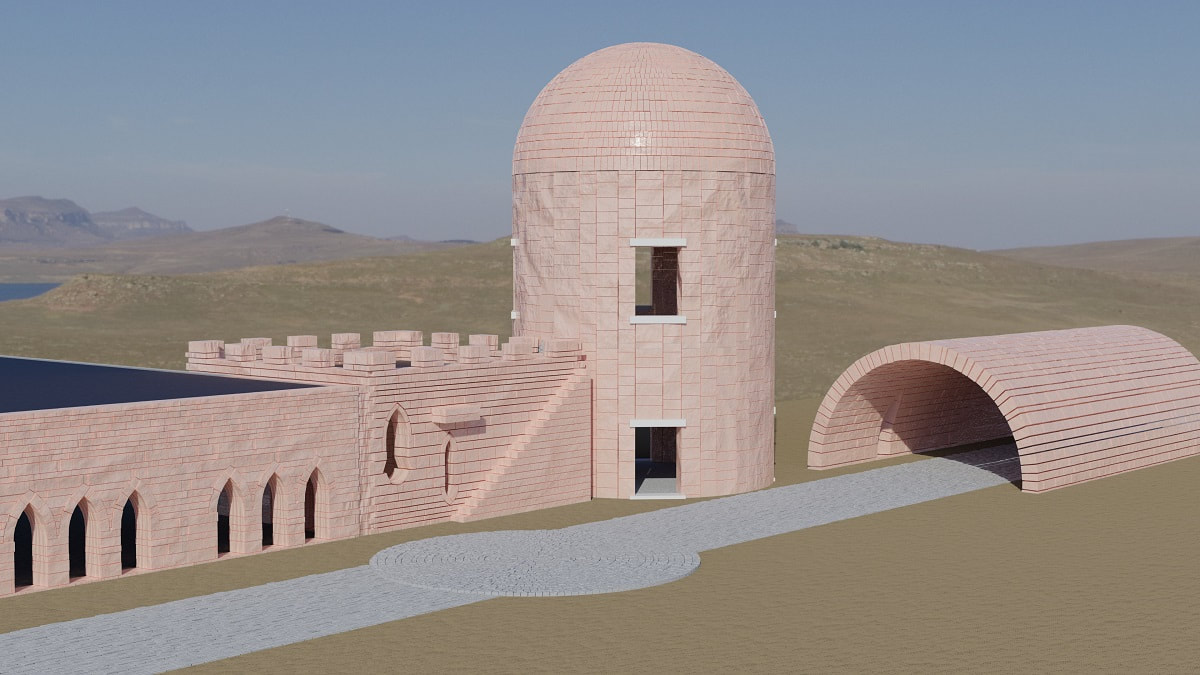
Blender Wall Factory - The above visually demonstrates the default variables in Blender's Wall Factory, where you can create rapid visualizations of stone or rough textured or smooth concrete block walls. The Wall Factory can also be useful for quickly creating assets/visualizations of stone churches, tunnels, pathways and other somewhat complex multi-stone/block objects. In this example I've included all of the main variables. All you have to do is click the pull-down menu Add, Mesh, Extras, Wall Factory and the first mesh section appears. Individual sections with the same settings will all fit together end to end. Variables you can change include Wall Size, Edging, Block Sizing, Grout Thickness, Grout Depth, Openings (width, height, depth, bevel, where in the wall it appears), repeat windows, slots, crenels, shelf, and steps. Grout was left out on purpose. The Wall Shape section includes Radial (the circular stone road center) and Curved (the walls of the domed building. The dome automatically is created just by clicking both the Curved and Radial buttons (and you can adjust the stone sizes there too, as I've done in this example.)
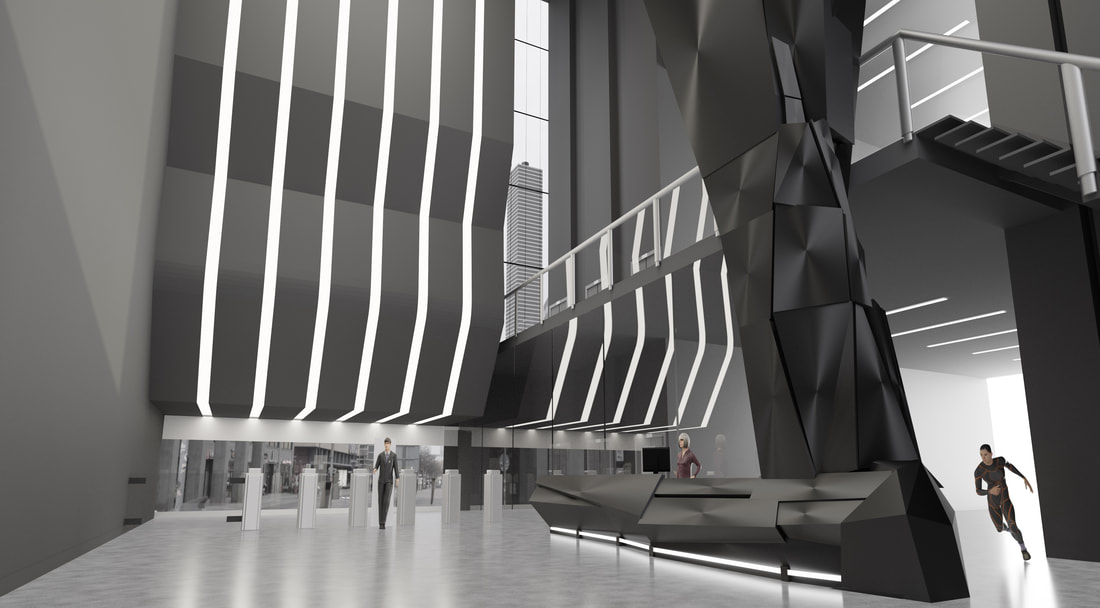
Arch Viz and Concept Art - Based on concept art by Ryan Woodhouse ( https://www.drawntothenorth.com/ ) I've made this lobby scene 3D model in Blender. I also used MakeHuman 3D models ( http://www.makehumancommunity.org/ ) imported as Collada (.dae) files and for the outdoor background (except for the high-rise which is a Blender building texture) sky and ground level outside are from an HDRI Haven ( https://hdrihaven.com/ ).
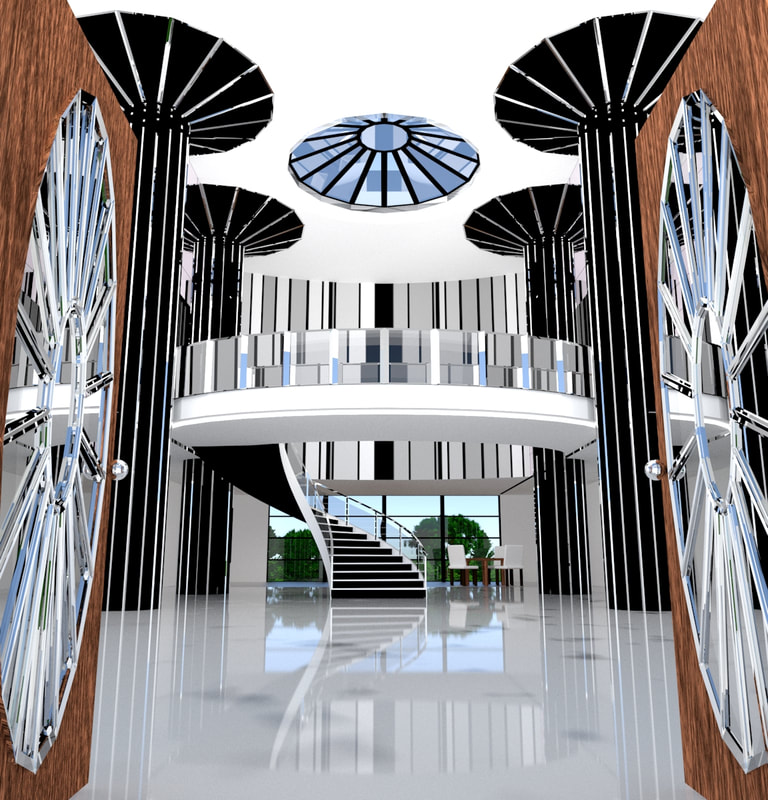
Below is a concept house lobby entry I made. The upper walls between the columns are a mirror panel illusion so that there can be rooms immediately behind them (simulates full column but it's actually half.) All of it is in Blender software including rendering in Blender Cycles.
Below is a model I made Blender 3D, using a design sketch and plans from the year 1921 by Montgomery & Niebecker. This design was the 3rd prize winner in the OWN YOUR HOME EXPOSITIONS 1921 which can be found in the collection of designs in the Home Builder's Plan Book. The competition was circulated through the leading architectural journals in November and December 1920, and the Own Your Home Expositions where held in Chicago in March 1921 and in New York in April 1921. The grass is my own grass particle solution I've used above.
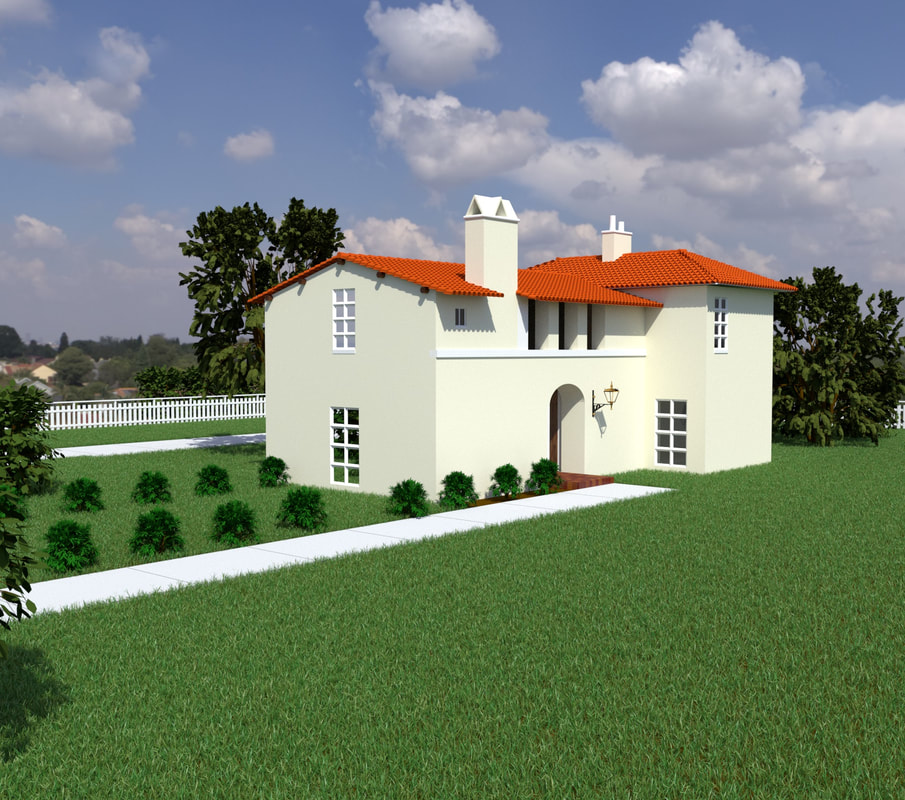
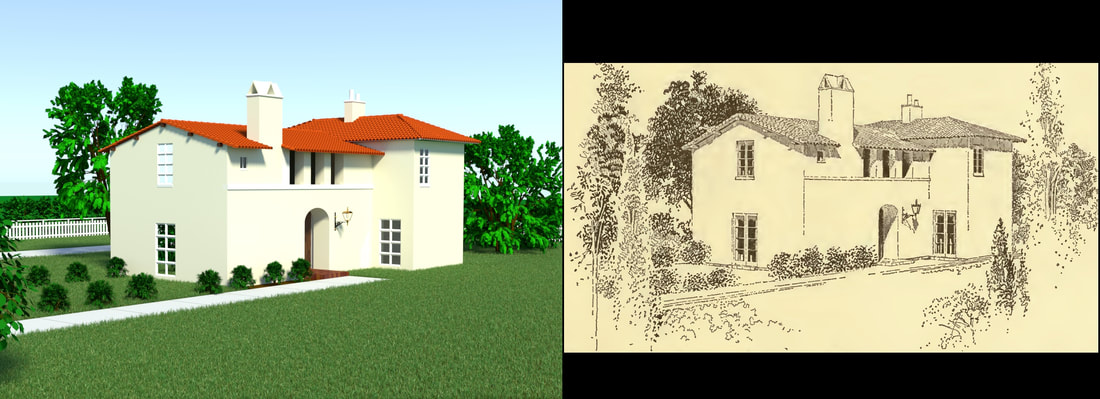
Above you can compare a similar camera angle of the 3D model (before the final lighting and coloring) to the original sketch to the right. Some information about how I modeled the above. There are roughly dimensioned architectural plans in that book, that helped to guess the scale of the un-dimensioned objects. The roof is the 7th roof model in Archipack collection, and I used the roof-cutter tool to edit the shapes. The plants are from the Sapling Tree curve generator. The fence is from Archipack. The windows are made by me by using cubes intersecting with my walls and a Boolean Subtract modifier to open up the wall window holes. The walls are just simple mesh planes with a Solidify modifier. The windows themselves are just 2 mesh planes, one with a Wireframe modifier, and the other is just a Glass Shader (no Wireframe modifier on the second one). The grass on the left was by the Grass Free Add-on (which I no longer use, I now use the very simple solution described above in the Retro Home Future Sky above.)
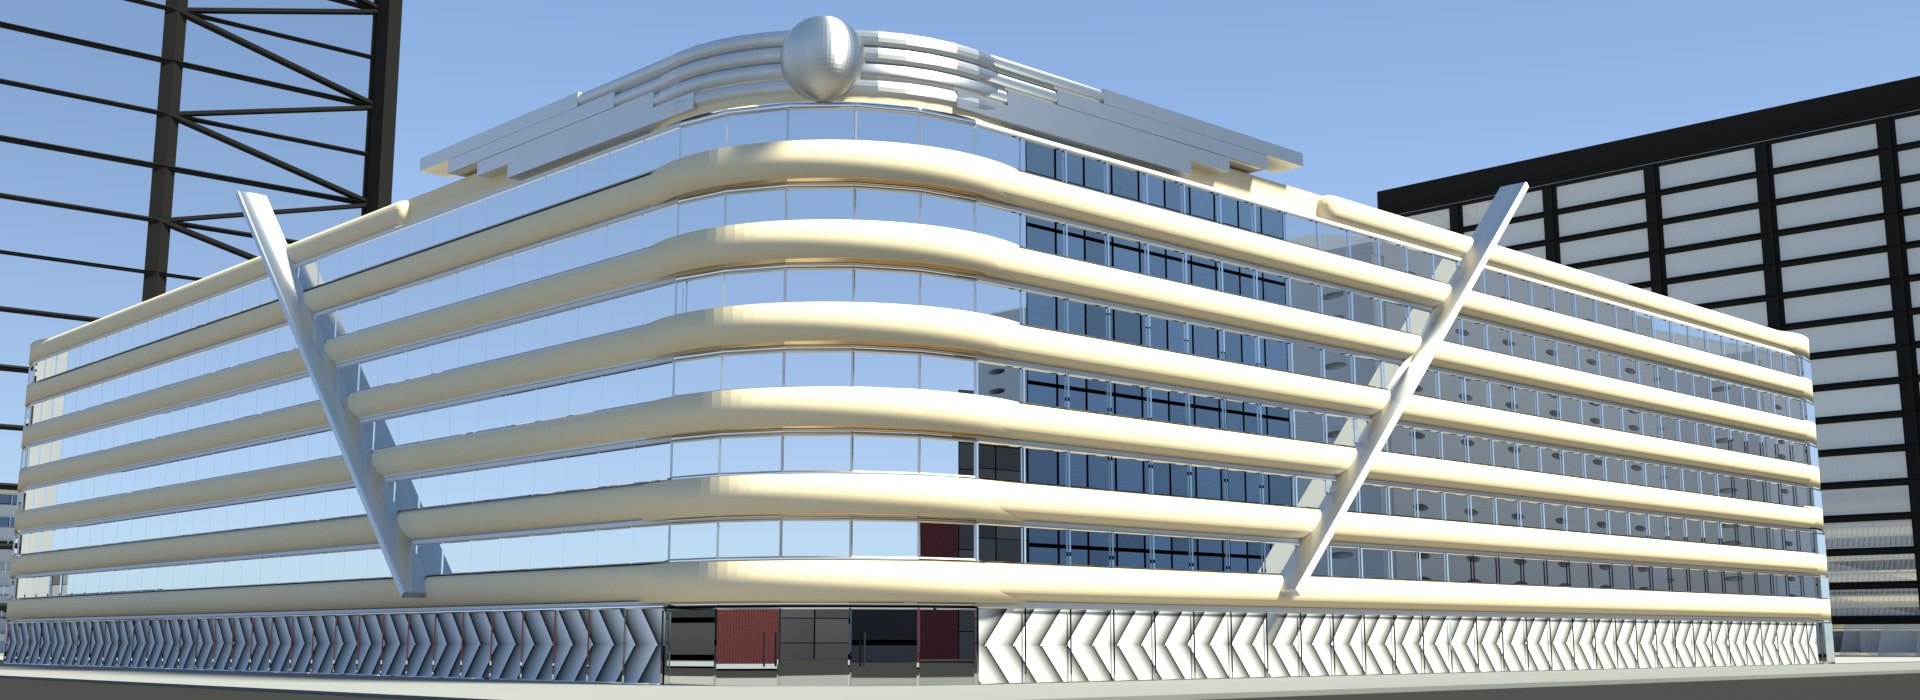
A concept building made in Blender. It's 100% procedural (no HDRI lighting or imported models, it's all from scratch within Blender.) Rendering was in Blender Cycles engine with 1000 samples, with a small clamp on the indirect lighting to combat a few 'fireflies' artifacts from all the Glossy Shaders I used on the windows and the Anisotropic Shader on the Stainless Steel.
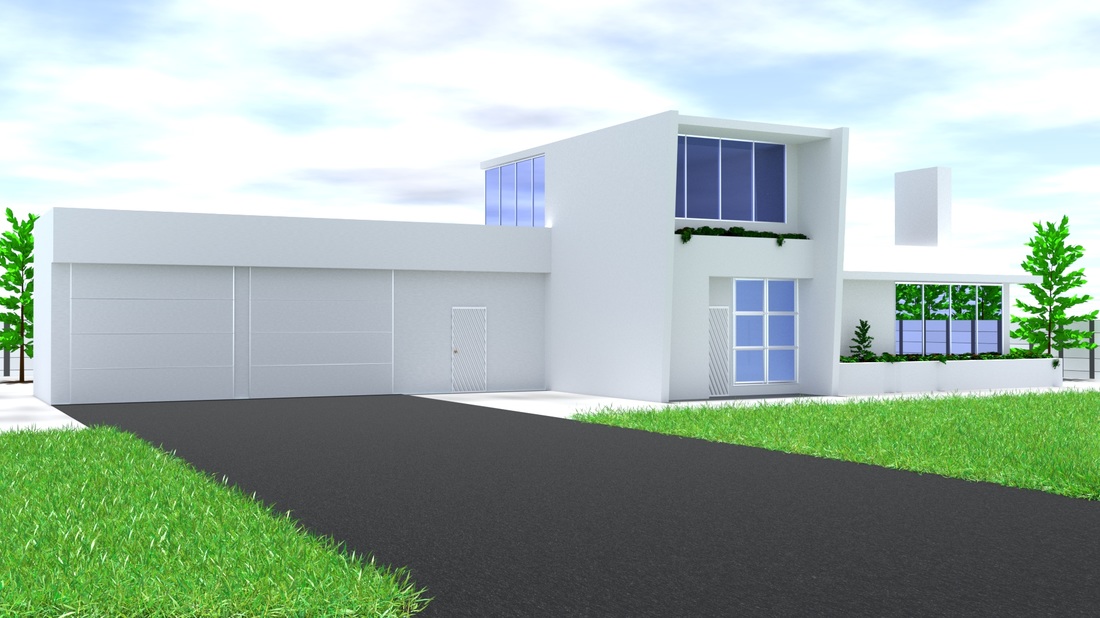
This is how the Retro House looked before I went all Visionary Futurist. The above was created entirely in Blender (see the other Retro House Future Sky with the flying vehicles image above to compare.)
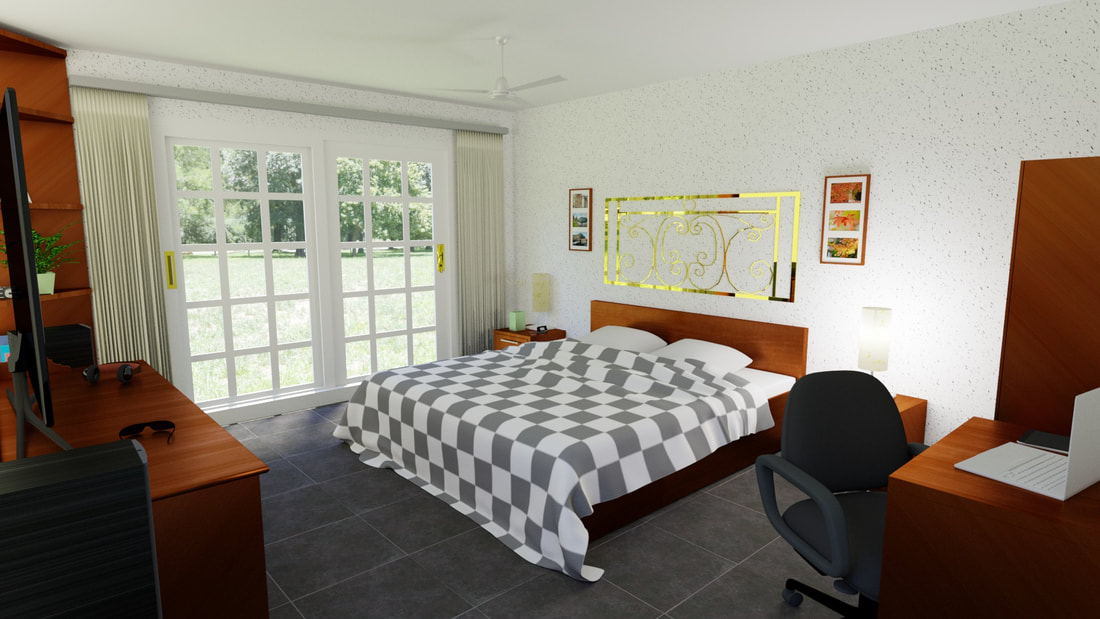
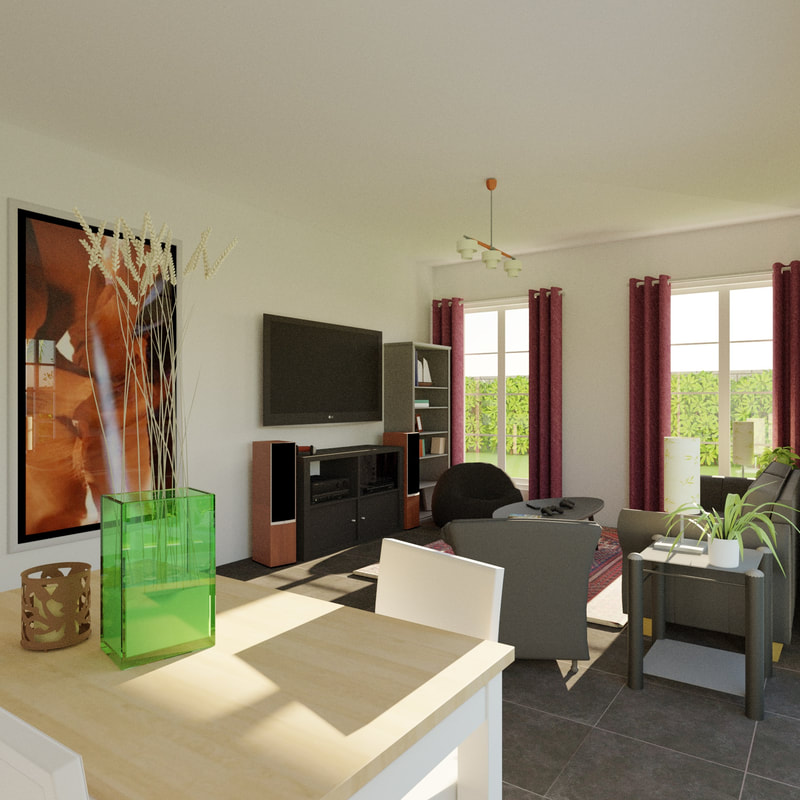
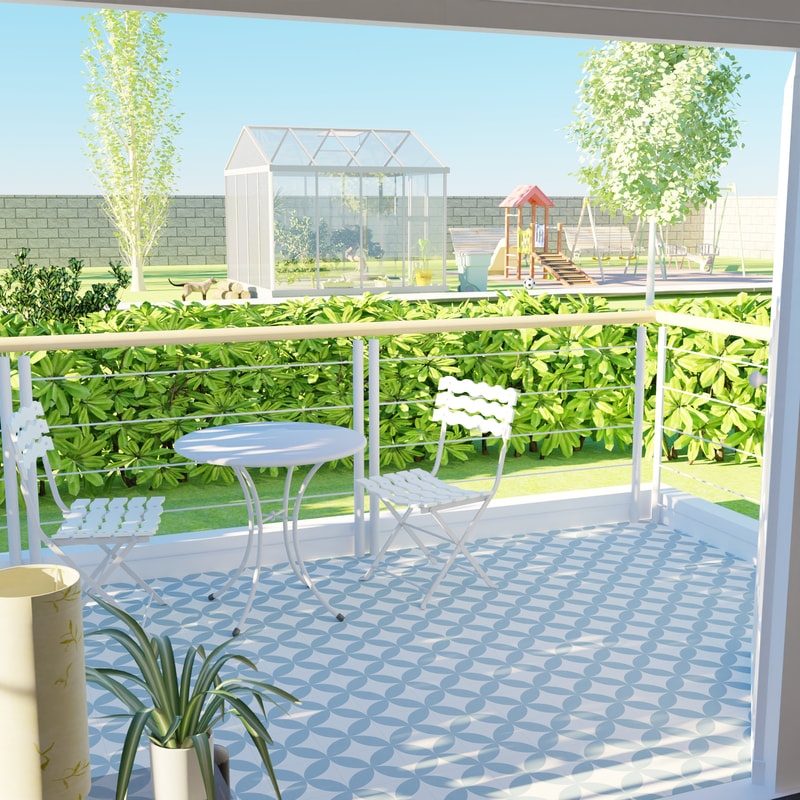
Using the Free Sweet Home 3d program in conjunction with Blender - In the above experiment I combined the free Sweet Home 3D interior design software with the free Blender 3D Cycles Render Engine to get this result. WHEN YOU ARE DONE CREATING YOUR MODEL IN SWEETHOME 3D, EXPORT IT TO .OBJ FORMAT BY RIGHT CLICKING THE 3D VIEW AND SELECTING THE PULL-DOWN MENU "Export to OBJ format". I rendered it with 1000 samples. I used a free HDRI Environment Background image from HDRI Haven. In Blender I assigned either Diffuse or Glossy shaders to the included image textures for the furniture, walls, floor and other items. The HDRI was set to an illumination of 20, and a "Sun" lamp outside was set at 50. The Glass shader on the windows limited light transmission, so I got rid of it and used a Transparent shader instead (not ideal, but getting rid of the reflections also can help lessen the Blender Cycles fireflies, which permitted a slight reduction of the Indirect lighting clamp I've been using to deal with the fireflies. A new better solution here may be to use Material Library VX "Basic Glass".) Blender's real-time EEVEE renderer can resolve this issue (and also would permit showing your clients a rendered on-the-fly project, or permit you to make a fly-through animation without consuming enormous computational resources, but there can be some glitchy looking flashing in the EEVEE renders if you do a fly through; I used Blender 2.79b official release for the above. Regarding Blender for architecture in general, in addition to the free Archimesh and Archipack add-ons, one may also be interested in Blender's arch features for creating: rooms, floors, doors, rail windows, panel windows, cabinets, shelves, columns, stairs, roofs, decorative props (like blinds, curtains, lamps, books etc.), fences, trusses, Wall Factory block masonry wall mesh, beam meshes with various profiles, plumbing pipe joints and more, all included and free! When combined with the Sweet Home 3D's .pdf sheet outputs and dimensioning capabilities, you can have lots of fun! SEE THE PRINTING TO SCALE PAGE FOR MORE INFORMATION ABOUT USING SWEETHOME 3D FOR CREATING BLENDER .PDF FILES/DRAWINGS TO SCALE.
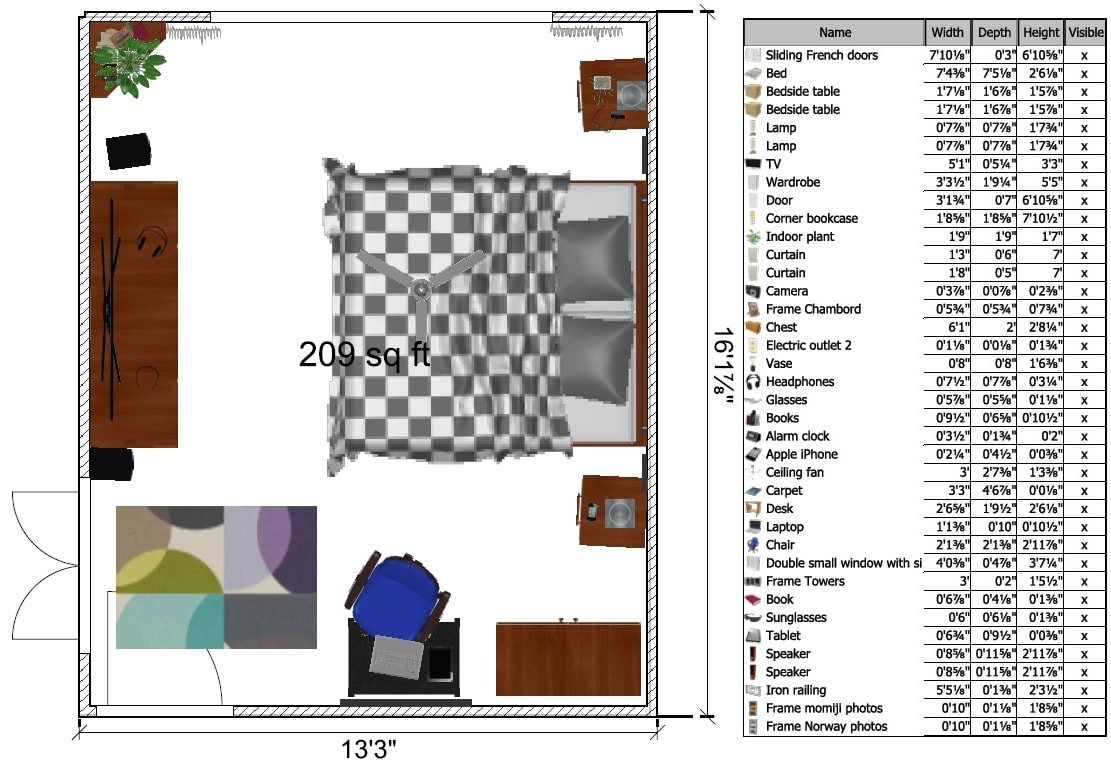
Below are the Door Types and Stairs you can find in Blender 2.79b Archipack and Archimesh add-ons.
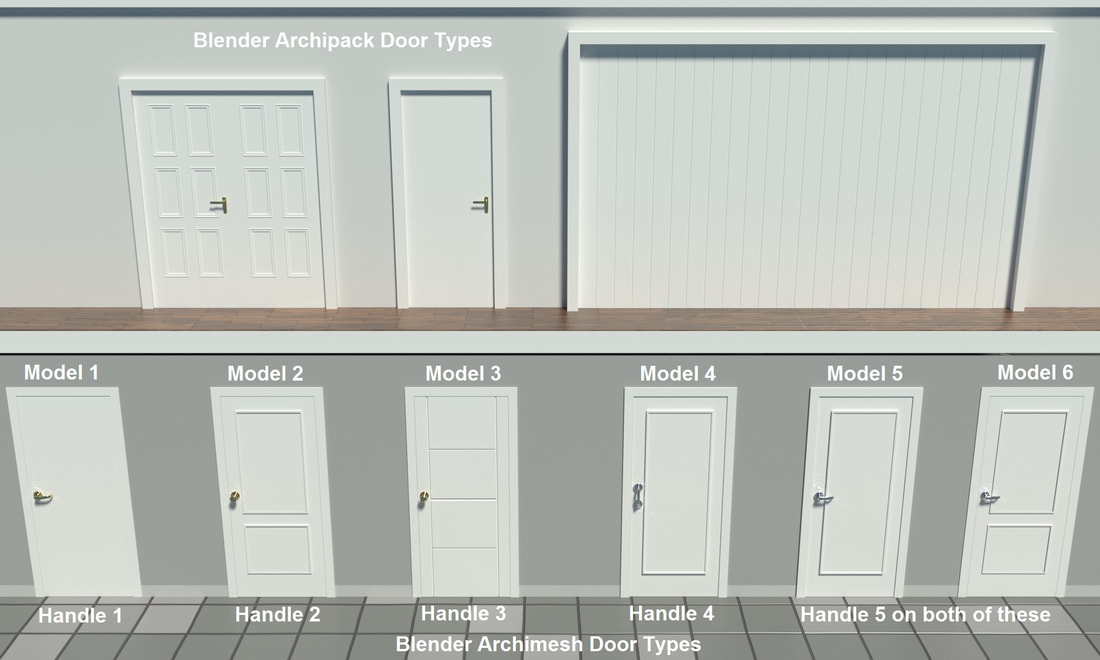
These are the stairs in Blender's two architecture add-ons, the new Archipack and Archimesh
Make sure to check out the free add-ons in Blender under the User Preferences area the Archipack, tinyCAD Mesh Tools and Archimesh.
In addition to regular Blender, you may want to keep an eye on developments in the fork project Mechanical Blender (Blender for CAD Environments) at http://www.mechanicalblender.org/ , and if you really need a free CAD program check out FREECAD at http://www.freecadweb.org , it's not Blender, but it's very good and can output files that can be rendered in Blender, like this one http://forum.freecadweb.org/viewtopic.php?t=5735
Also check out this free (but support the devs if you can) program too, Sweet Home 3D (which you can also buy through Amazon with extra furniture and bric-a-brac models), which allows you to not only import and export to render in Blender, it also allows you to print and .pdf interior floor plans with dimensions and more.)
One other thing I think is important to mention, check out Microsoft's 3D Paint (comes with Windows 10) which exports FBX format files, which can be imported to Blender.
Rendered in Blender at 1000 samples, these two modern homes were originally designed/modeled by Rick B. (originally .skp files at 3D Warehouse), and a Citroen GT concept car by Will A. of Shimmy Design (also originally in Sketchup but brought into Blender with the importer module). The grass in this one has 2.8 million blades, and is all procedural. I also converted the shaders on the building and car, had to filter the glossy and did some other things to make the Sketchup models work better in Blender.
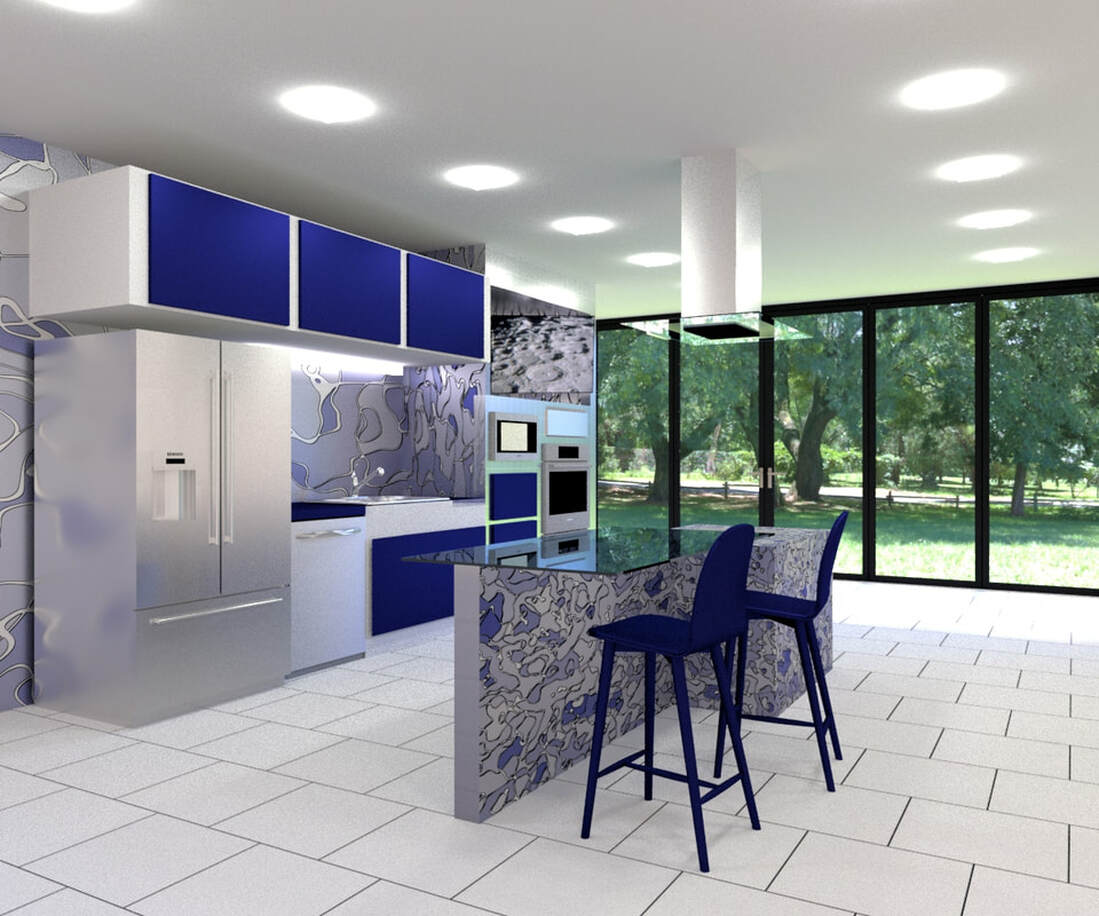
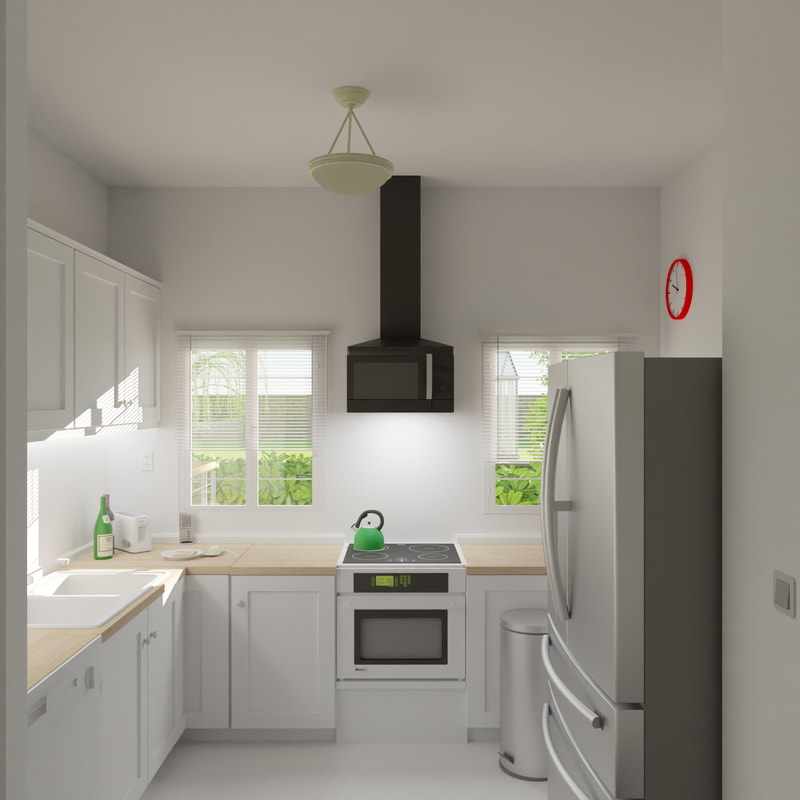
I made this kitchen in Blender. I imported Sketchup models from several manufacturers:
- Bosch for the refrigerator, microwave, heater drawer, ventilation, cooktop, ovens;
- Kohler for the faucet and sink;
- Whirlpool for the dishwasher;
- NanaWall for the fully opening door/window wall;
- Stool by Icons of Denmark's Jesper J. (Manufacturer: 8000c/Design: Holmback Nordentof).
I made the cabinets, TV, walls, floors, lights, glass counter top etc.. Outside HDR environment/lighting is a free image from HDRI Haven.
Below in this 8 bit GIF conversion (which diminishes the color details) you can see most of the fire's physics in this animation done in Blender.
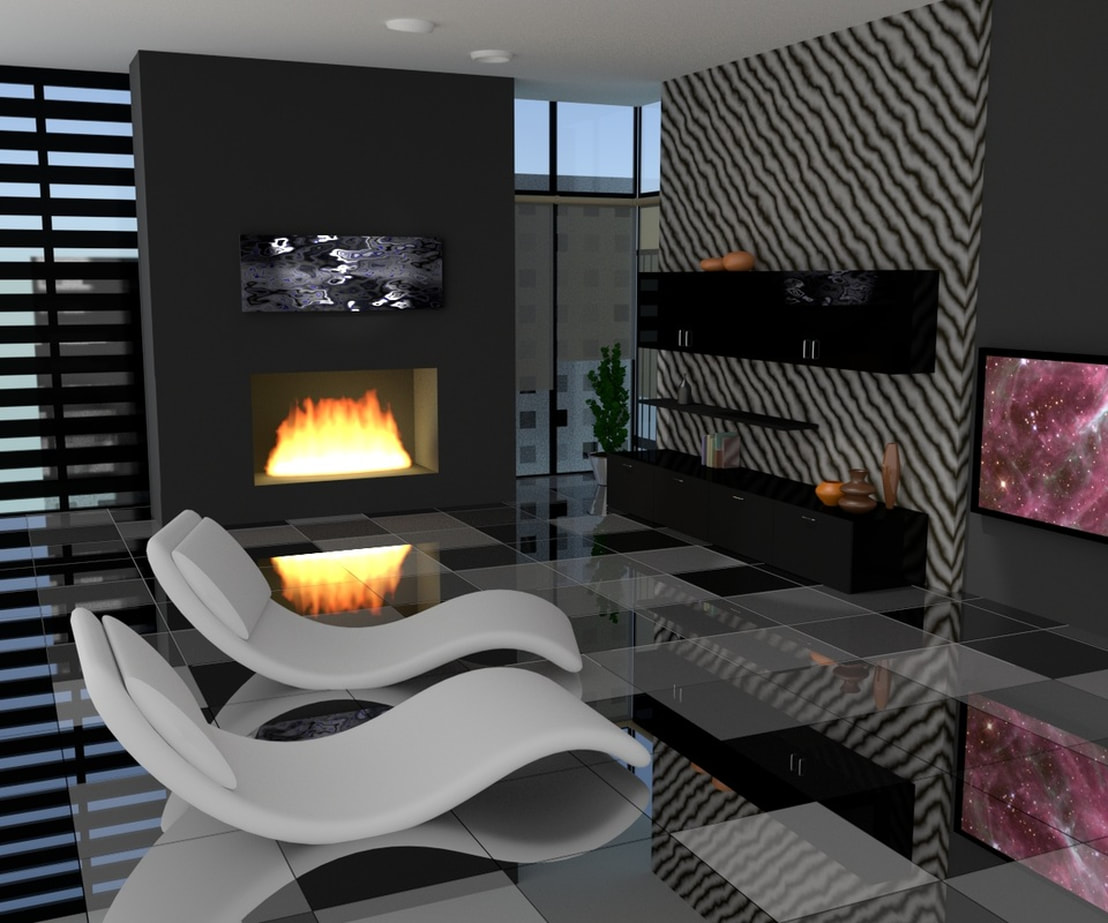
This fire is using Blender's fire physics and applies roughly half of Andrew Price's fire tutorial. I've also added new abstract art over the fireplace, and changed the lighting too. All is procedurally generated except for the nebula on the TV.
|
Fire Pit - I've been playing with fire in Blender (as I'm experimenting with putting fire and water physics into architectural concept renders). I followed many elements within Andrew Price's Jan. 2015 tutorial (that I couldn't have arrived at without the tutorial). The animation to the left gets degraded by the 8bit GIF conversion process, but it conveys the general idea that it's working (and looks great in the original frames, especially the smoke).
|
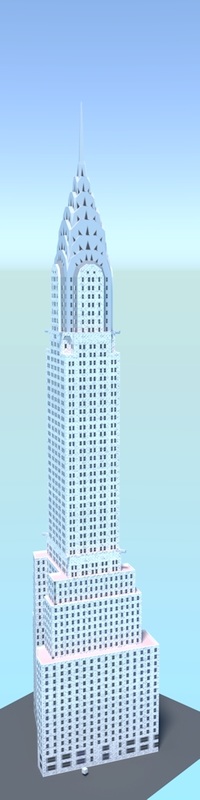
I had been testing the sketchup importer, (that was for version 2.79) and it worked, as you can see above and to the right. Now that it seems that SketchUp seems to be heading in a different direction I don't know if this possible any more. That is a Herman Miller Eames chair model (by them) in .skp format. I set the chair to smooth shading, but didn't change anything else. I made a mirrored floor so you can see the under side. To the right is the very low poly Chrysler Building model by Google Geo Models.
|
|
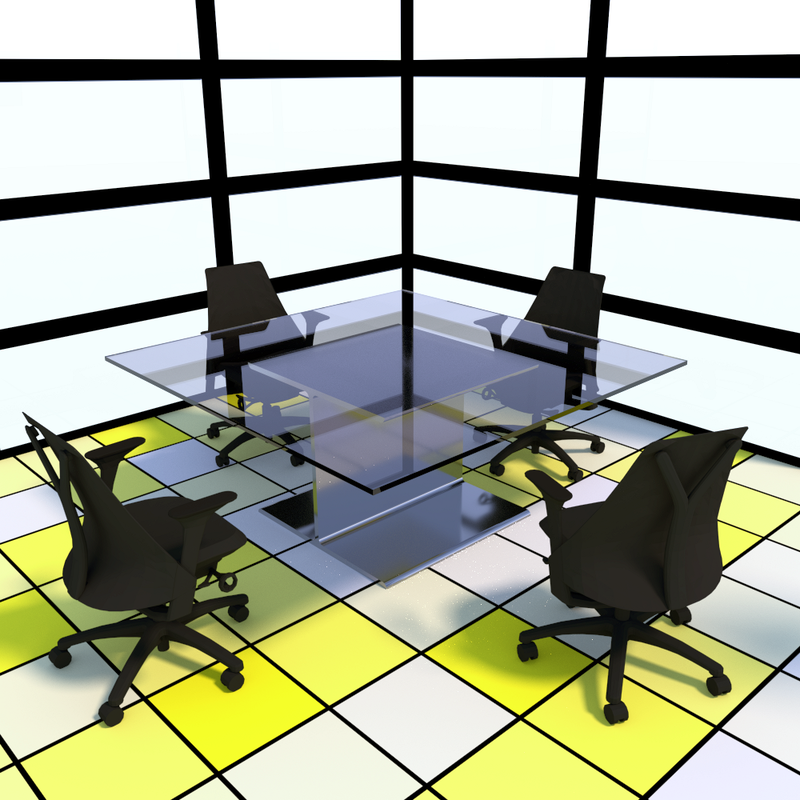
100th Floor Break Room. I usually make my own stuff from scratch, but the above table and chairs were a successful import experiment using the Herman Miller 3DS models (from their website) imported into Blender. I've scaled up the I-beam table and changed the glass mesh from the original (it's the same exact dimensions of the original, but I made it a single mesh plane with a Glass shader and a Solidify modifier, as the original's glass tabletop had multiple layers that wouldn't behave materials-wise. For the chairs, they're called Sayl chairs, and I had to go with a charcoal color as there was funky stuff going on with the meshes near the armrests that also wouldn't take on a uniform material coloration they way I wanted it to go (which is understandable since it's not originally from a Blender file). Anyway I think many of these free Herman Miller 3DS models can be used, and look pretty nice, and with a little work on them relative to the materials (or replacing elements that don't take on new materials you want to apply) you can have a very nice collection of furniture in your project.
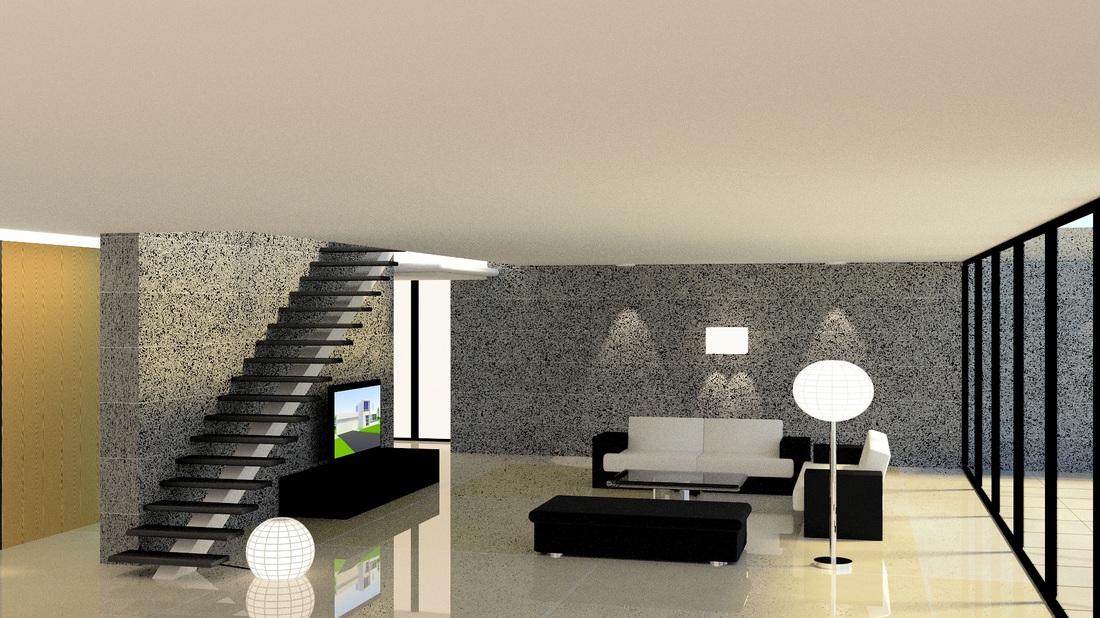
This is my Blender model, 100% procedural (i.e. all computational, no decals for material/textures), and rendered in Blender Cycles.

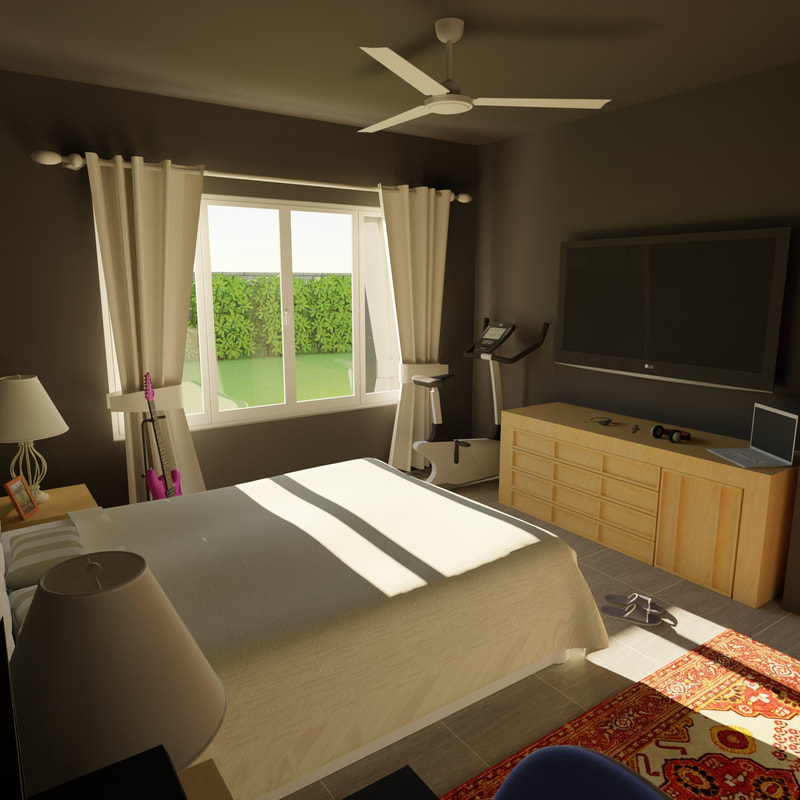
I made the above room 100% procedurally generated in Blender except for the image on the TV. Many of the ways of deriving the materials/textures I've covered previous posts here on this website. Feel free to look around, and if you have questions about any of it, feel free to contact me.
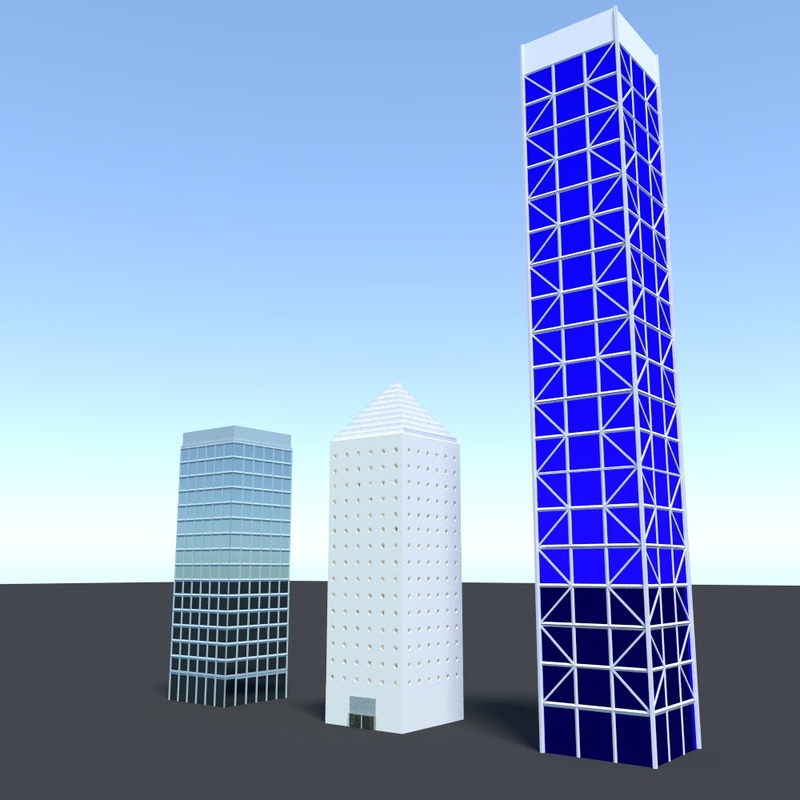
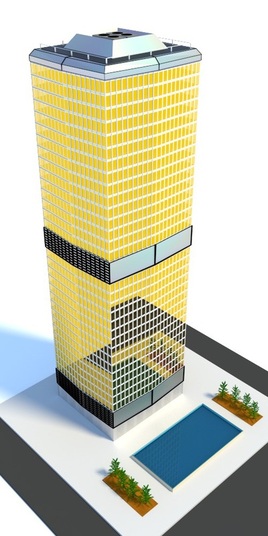
An experiment in high-rise structures. Top left - A Framed Tube high-rise. Center - A Perforated Shell Tube with perimeter sheer walls just under 30% penetrations. Right is a Braced Tube high-rise. Below in this golden high-rise I couldn't use the glass shader (it was causing an undesirable refraction effect at this angle) so I combined a glossy shader with a transparent shader (which is easily seen to good effect on the upper left of the buildings windows).
|
|
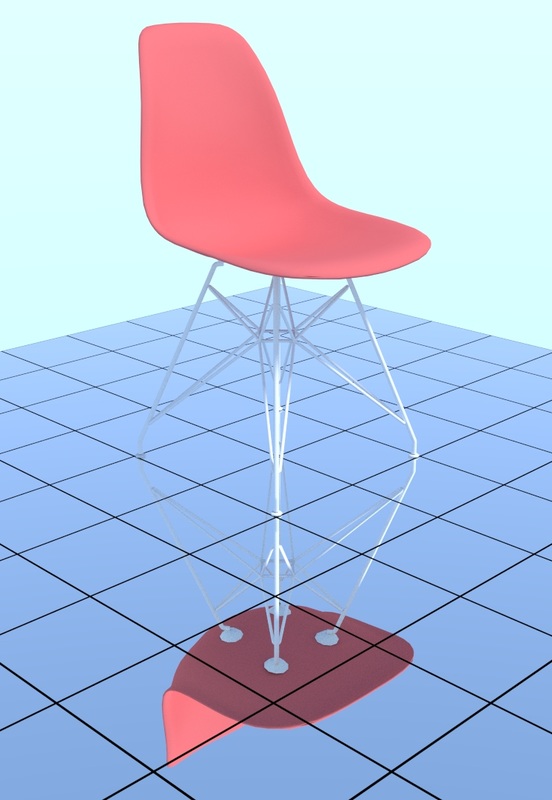
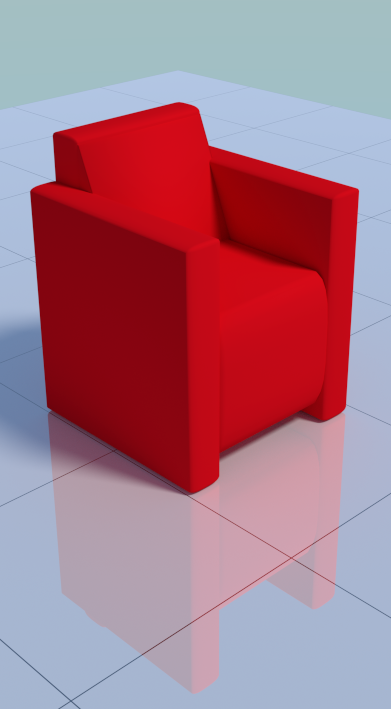
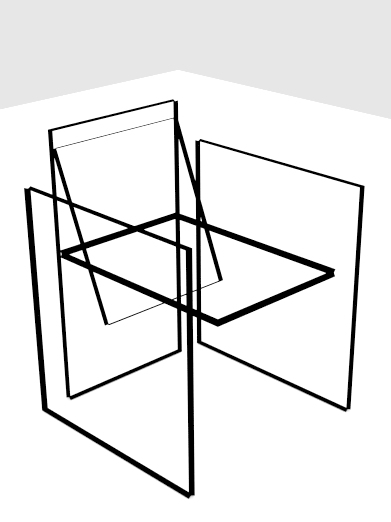
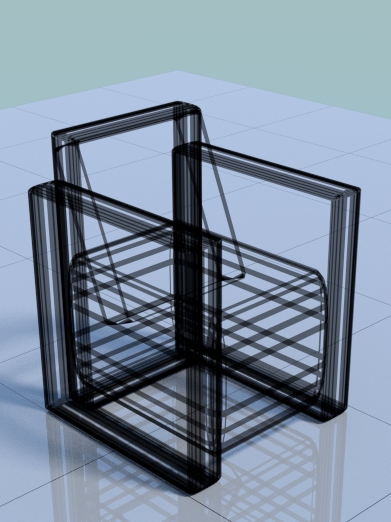
This armchair is made from ONLY 5 MESH PLANES! The magic is using a solidify modifier that goes in the direction you specify (that way you never exceed the dimension limitations), and the curvatures are achieved with only a Bevel Modifier. To the right of the red chair are its Mesh Planes (with a Wireframe Modifier applied, and with the Solidify and Bevel modifiers removed) showing just how simple this chair really is. To the right shows the Solidy and Bevel modifiers applied (with a Wireframe and Transparent modifiers applied to show them better.)
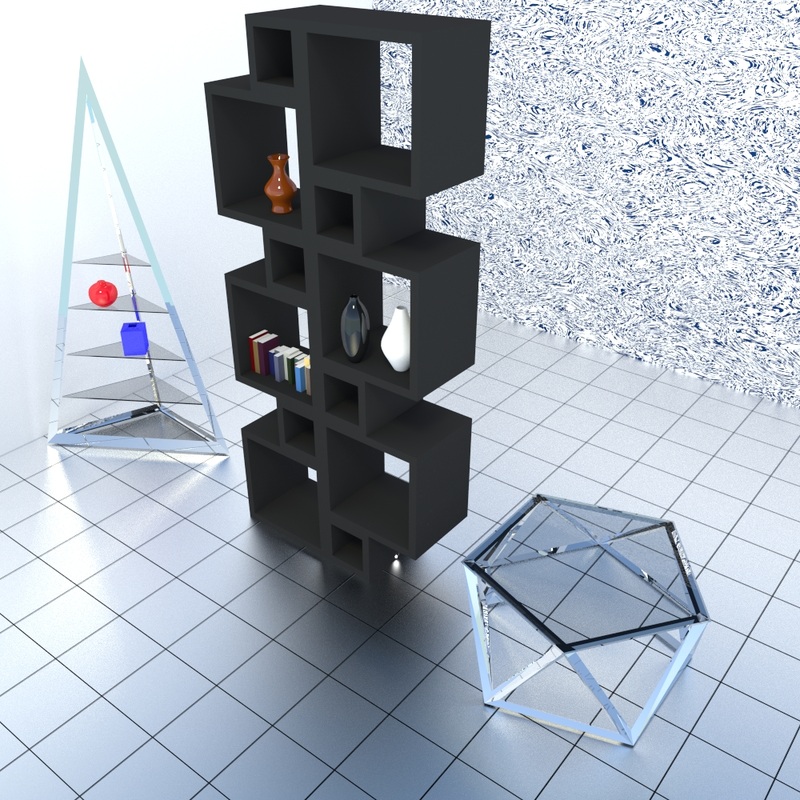
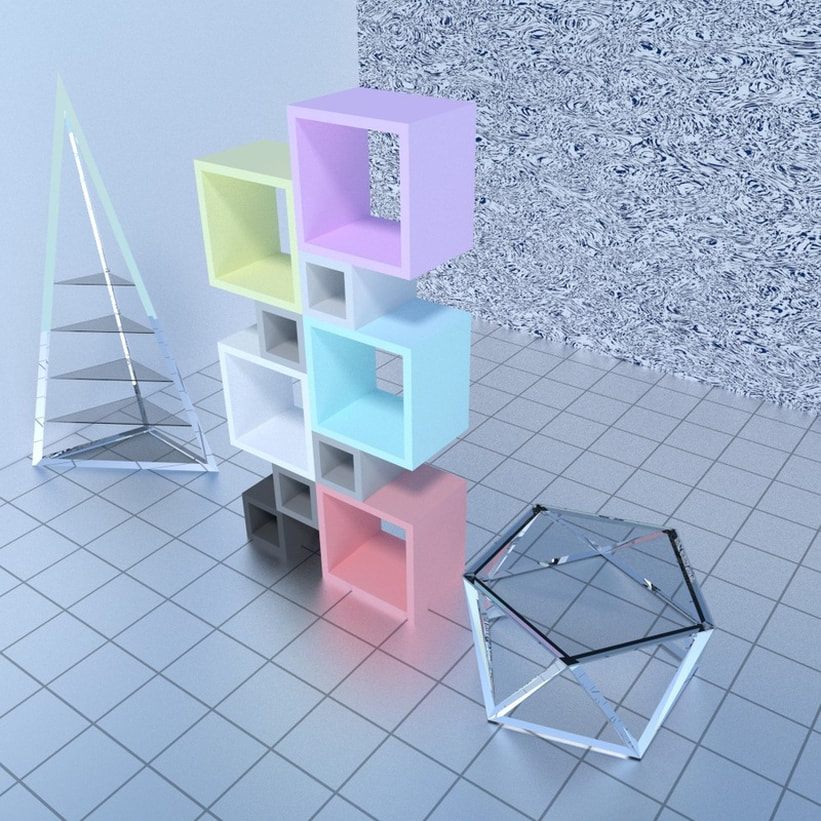
Above are some shelves and a glass table in Blender, all procedurally generated (including the right wall.) Below is the initial way I was going with it, but I decided to check out other options, like firming up the tile lines, and using conservative black for the shelves, adding bric-a-brac, and modifying the lighting.
Blender Classroom Demo all 145 video frames rendered, 1000 samples each frame, no GPU, Cycles X used
This is a rendering of all 145 frames of the Blender Demo file by Christoph Seux available at https://www.blender.org/download/demo-files/. You may have seen people using the Classroom Demo file for benchmarking PC's, but here I've actually rendered all 145 of the frames on the original camera track in the file, which I've looped back and forth several times and added audio. I used the experimental Cycles X (August 2021) to render each frame individually, and then used the Video Editor in regular Blender 2.93.2 to edit together each video strip, the audio and the final credits text. No GPU was used to render the frames, only an AMD Ryzen 7-5700G APU. It took 2 days, 8 hours and 15 minutes to render the 1000 samples per frame (the original file setting was for only 300 samples per frame, but that was a bit noisy, and turning OpenImageDenoise on created some very bad flickering artifacts, so there is no de-noising used here at all.
This is a rendering of all 145 frames of the Blender Demo file by Christoph Seux available at https://www.blender.org/download/demo-files/. You may have seen people using the Classroom Demo file for benchmarking PC's, but here I've actually rendered all 145 of the frames on the original camera track in the file, which I've looped back and forth several times and added audio. I used the experimental Cycles X (August 2021) to render each frame individually, and then used the Video Editor in regular Blender 2.93.2 to edit together each video strip, the audio and the final credits text. No GPU was used to render the frames, only an AMD Ryzen 7-5700G APU. It took 2 days, 8 hours and 15 minutes to render the 1000 samples per frame (the original file setting was for only 300 samples per frame, but that was a bit noisy, and turning OpenImageDenoise on created some very bad flickering artifacts, so there is no de-noising used here at all.
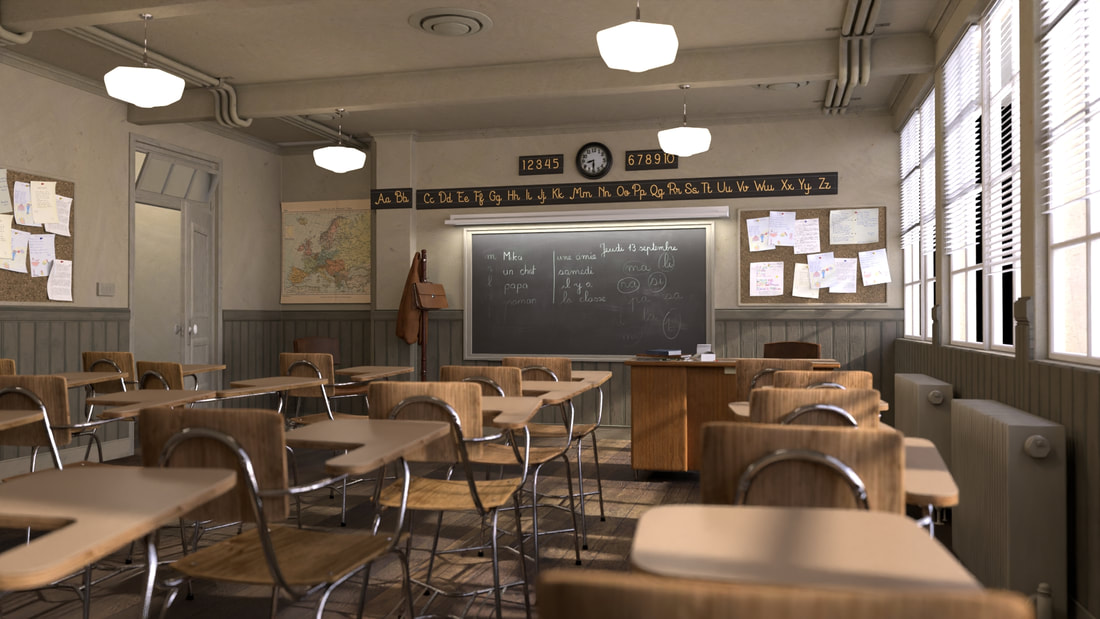
Turning on Open Shading Language (in any Blender version) had very negative effects both in the time processed and I really didn't like how it was removing light from the edges of the wood panels in the front of the room. Unfortunately I've used Open Shading Language in the past for some things, but I won't be doing that again. You also might want to do at test render of a few frames of your animation if you are using OpenImageDenoise because I saw some jiggly artifacts on the classroom floor boards from it that I really didn't like after rending an entire animation (the way I'm dealing with that is greatly increasing the sampling count to reduce both the noise (not using OpenImageDenoise and it also has eliminated the artifact completely.)

In this experiment I'm testing using only the Brick Texture as glass curtain wall on the tallest tower and the one on the right, using different patterns. The test also showed that the lighting is working O.K. even at this large model size (it's 1:1 in the model.)
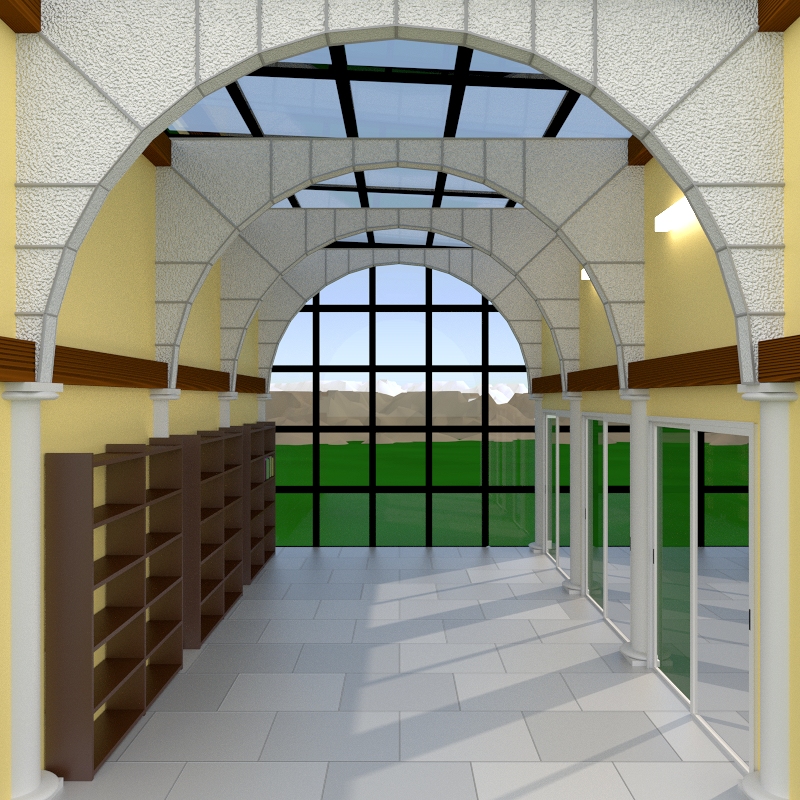
Sometimes you don't want to go fully photo-realistic for a presentation so that a client doesn't say "This isn't what you rendered." Keeping it obviously non-photorealistic can be helpful if as-built comes in far from what you can simulate materials/textures wise. The lighting is key to this, don't use HDRI's or Nishita Sky Texture if you want to keep it artificial looking. Here I used a number of things to arrive at the above model, the Archimesh add-on for the arches, columns, room, sliding doors, bookshelves, and a few books. Glass roof and wall made from Brick Texture into a Glass BSDF. Floor is Brick Texture with Noise node. Grass is just a mesh plane with a green Diffuse BSDF with a Noise node. Sky is Sky Texture. The beams are also procedural, and the landscape generator was used for the mountains on the horizon, 1 Sun for the outside lamp, used the Environment/sky texture further illumination by adjusting its strength, and the box lights are just emission cubes (made into rectangles.)
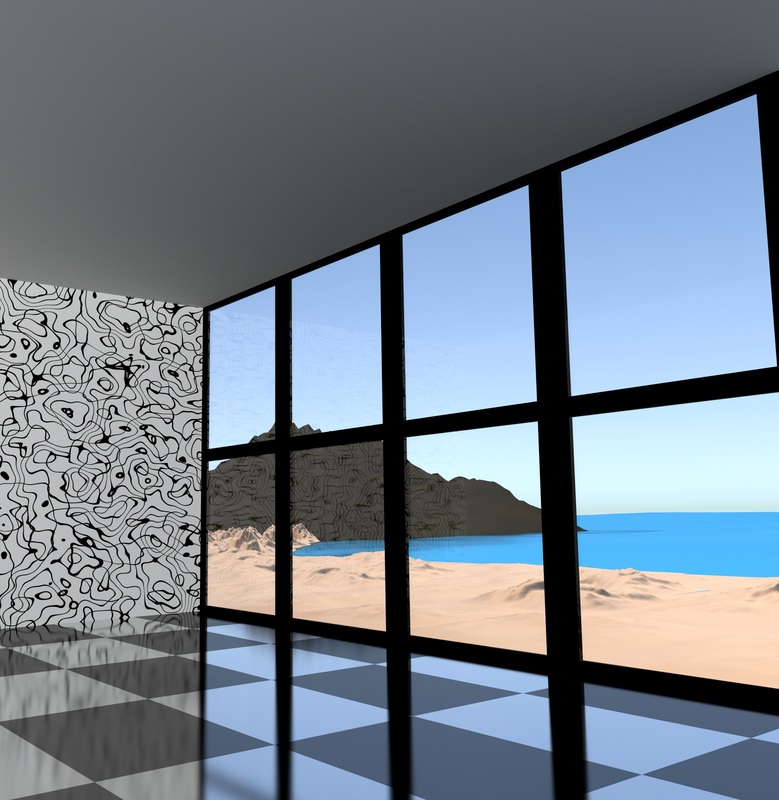
In the above experiment, a Brick Texture was used to make the Windows (and frames) and the wild wall pattern - I made these windows and frames using a Brick Texture with a Glass Shader (with a Solidify modifier of 2"), and also the funky effect/pattern on the far wall (I'll explain how to do it at the end) is also using a Brick Texture node, with a Noise node. The floor is Checker Texture into a Glossy Shader, but I put the Checker Fac directly into the Material Output's Displacement input, which gave more defined edges for the Checker tile floor. I used the landscape generator for the land features, and the Ocean modifier for the Ocean with just a Glass BSDF (with an Index of Refraction, IOR, at 1.333 of water.) 100% procedurally generated in Blender Cycles, no UV Maps or image textures used.
And now here's the node order on how to do that funky wall pattern:
Noise Texture (Scale 5, Detail 2, Distortion 0) Color output to Brick Texture Vector, Brick Texture default settings, Color output to Diffuse (default) BSDF to Material Output.
And now here's the node order on how to do that funky wall pattern:
Noise Texture (Scale 5, Detail 2, Distortion 0) Color output to Brick Texture Vector, Brick Texture default settings, Color output to Diffuse (default) BSDF to Material Output.

The above is a structural steel I-beam that is very accurate in shape to a vintage specification (although I've scaled it up in this shot for the lighting experiment I'm also doing in this rendering) which shows that Blender can be used to make accurate representations of almost anything. All of the elements are procedurally generated (no outside images or UV maps.)
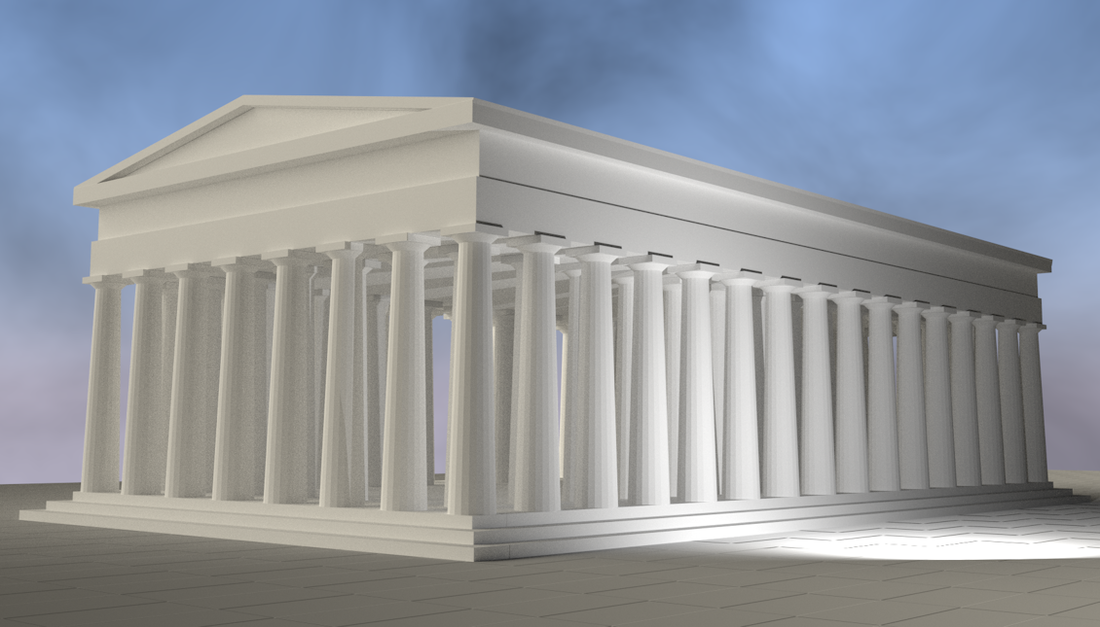
This was one of my earliest creations years ago in Blender. I made this Doric Column experiment using Blender Cycles only.
All is procedurally generated. The fly-through frames below were also generated in Blender too (the lower resolution due to the GIF conversion process and the lower number of render samples in order to generate the animation quickly). As you can see, the camera path can be set to go anywhere you want!
All is procedurally generated. The fly-through frames below were also generated in Blender too (the lower resolution due to the GIF conversion process and the lower number of render samples in order to generate the animation quickly). As you can see, the camera path can be set to go anywhere you want!
The above experiment (by me) shows how Blender permits us to have control of water features (like fountains, ponds, streams etc.) and complete control of the sky (which could be an HDR image of your construction site) which in this case an Environment texture that acts like a HDR background because it actually wraps all the way around the model, casts light on it and can be used for a flyby animation going in any direction. Also consider playing with Blender's fluid physics engine to add things to your presentations that can't be done in many regular architectural CAD software.
If you or your company would like to find out more about using Blender for architecture, or you'd like to get into Blender architectural modeling for visualization and planning purposes, or you'd like to create a custom object (i.e. an element, furniture, video display, fixture etc.) or need help doing so, or you'd like to create an architectural design project using Blender; use the Contact form to reach me, Jason Higley. Let me help you to get into architectural 3D modeling in Blender!
Contact me!
Contact me!
